


2025/04/08Views(18459)Reviews(0)
I. Target Audience
Business Owners, Management
II. Feature Introduction
SellerSpace's Role Management feature complements the Sub-Account feature, supporting custom settings for different roles.
SellerSpace has six major sections and over 40 detailed features. Sellers can assign viewing and operational permissions for various SellerSpace features to different sub-accounts, helping sellers manage stores hierarchically and refine operations.
If new features are added later, Role Management will be updated with corresponding permissions. The main account holder needs to manually update the role permissions of sub-accounts.
III. Use Cases
- Set up different roles and assign them to different sub-accounts.
- Allow or restrict sub-accounts from viewing data under certain features.
IV. Operation Guide
1. Creating Roles
Taking creating an "ERP Administrator" role as an example.
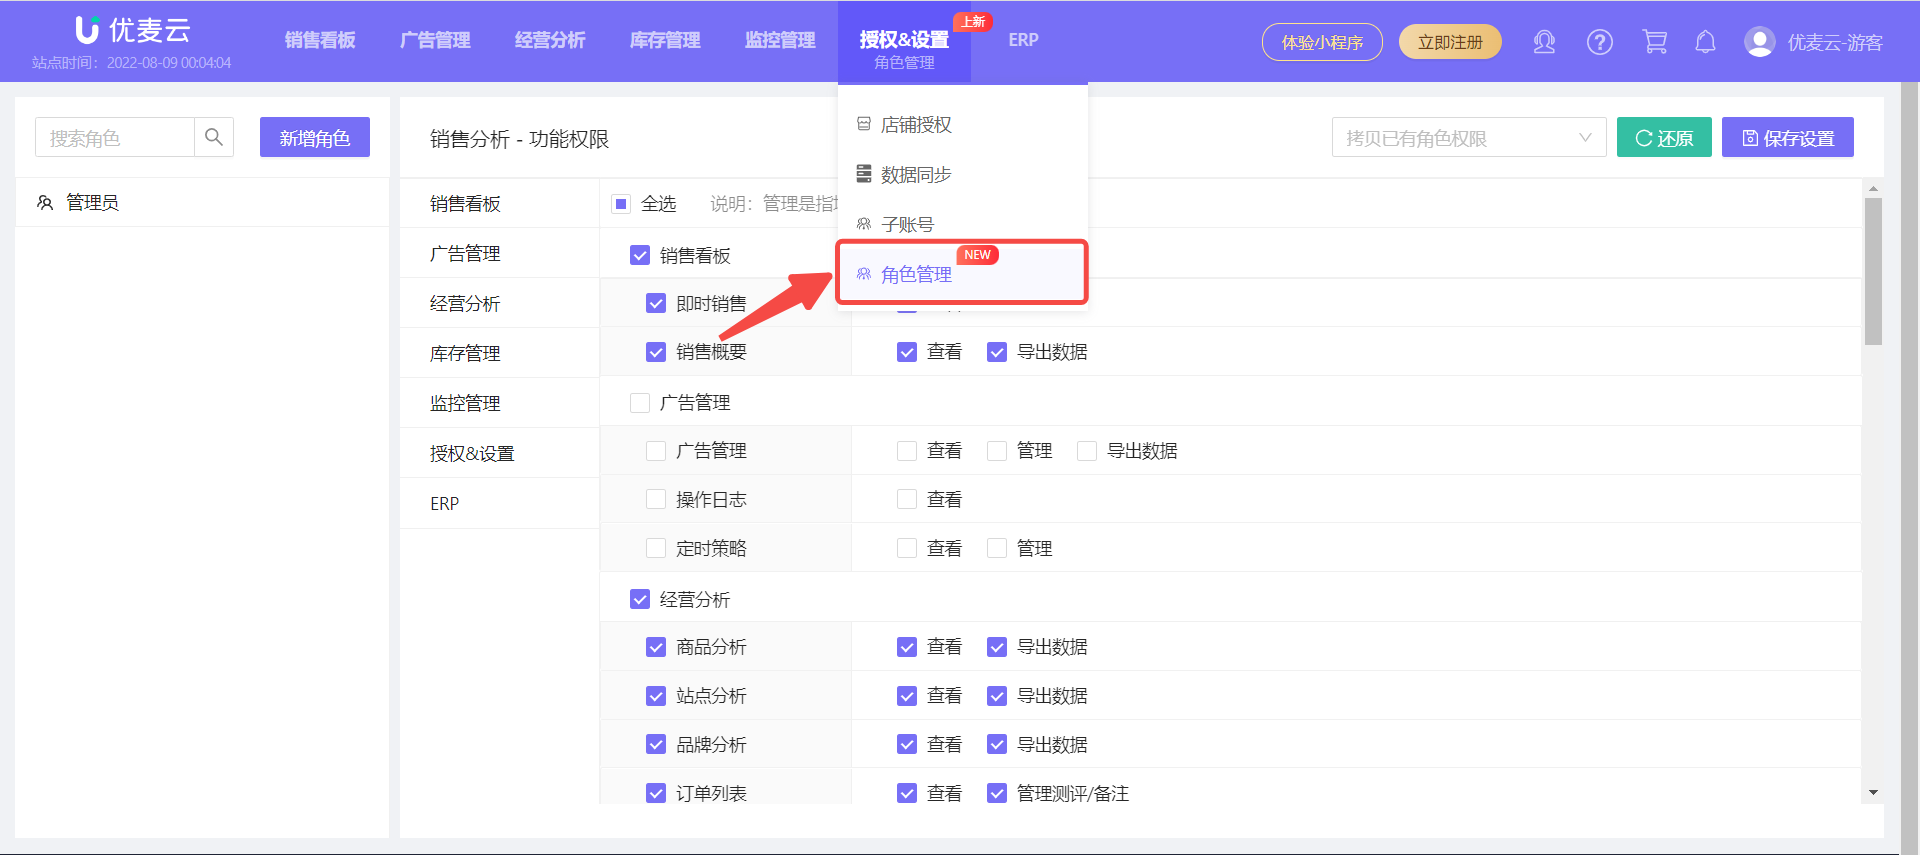
1.1 Log in to the main account backend, select: "Authorization & Settings -> Role Management" to enter the role settings page;
 +
+
1.2 Click 【Add Role】 to manually add other roles, such as: Advertising Operations, Inventory Management, Purchasing Staff, etc.
Special Note: The system has a built-in Administrator role, which by default manages all features except ERP functions. This role is editable but cannot be deleted.
 +
+
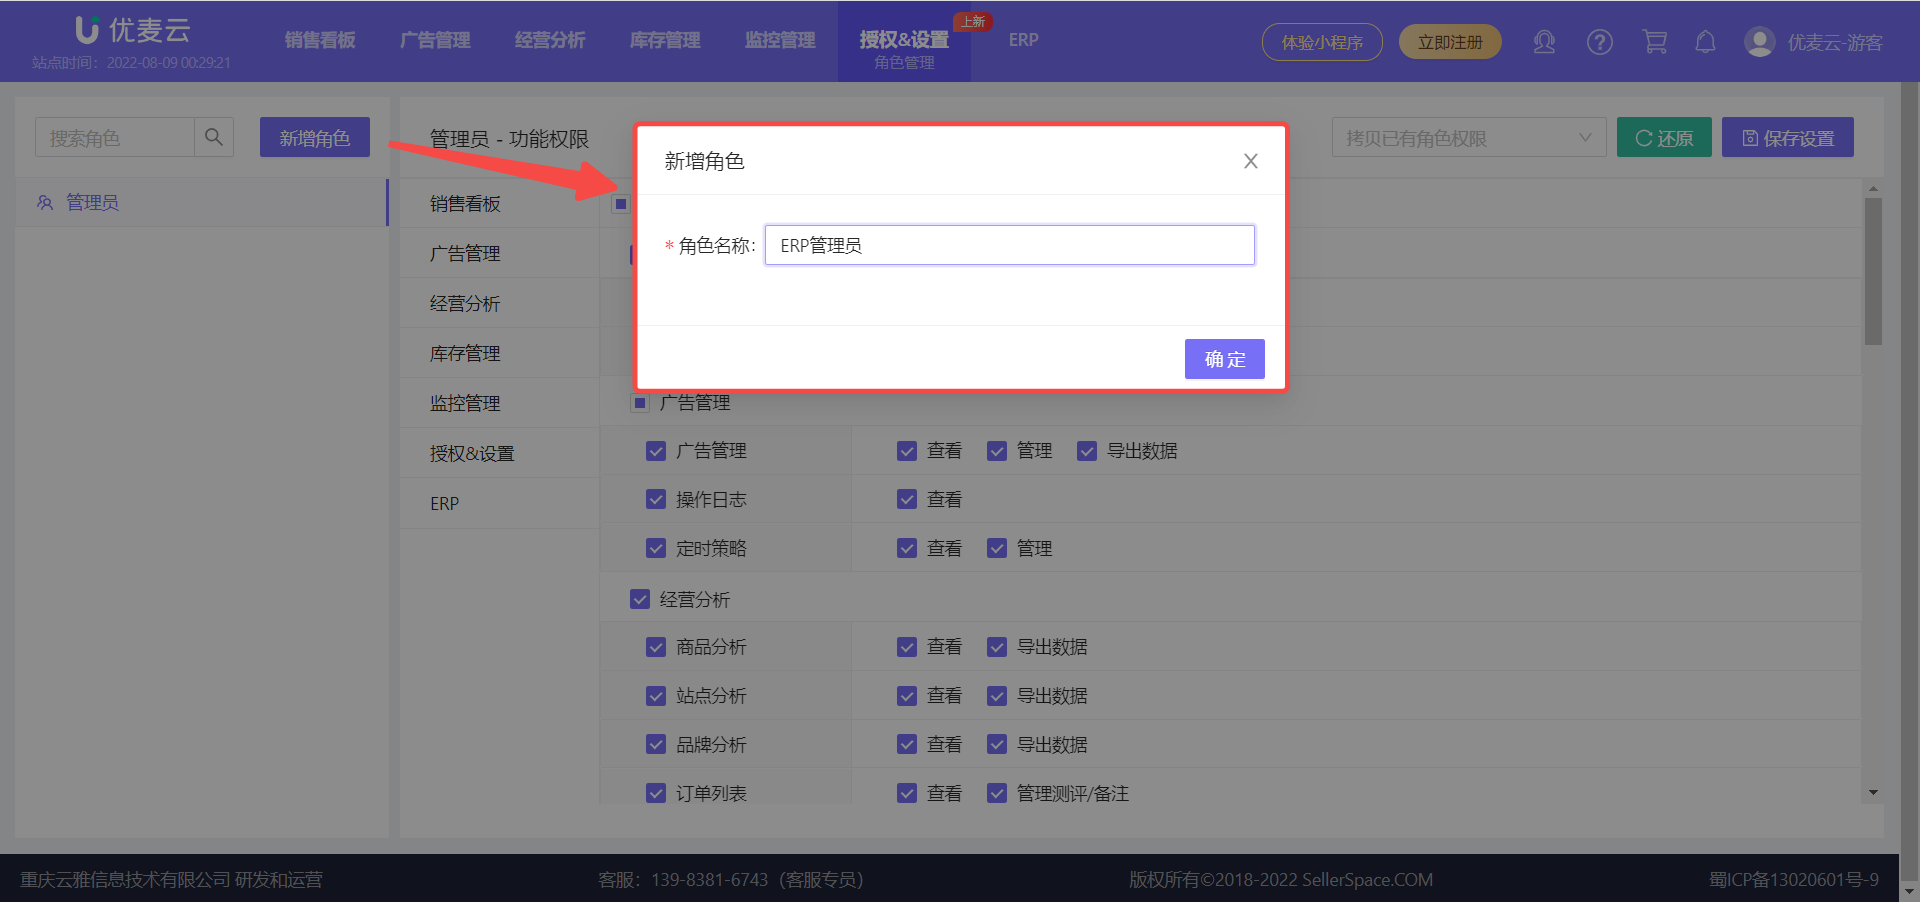
1.3 Name the new role. The role name can be up to 12 characters.
Enter the role name 【ERP Administrator】, then click 【Confirm】 to save the new role;
 +
+
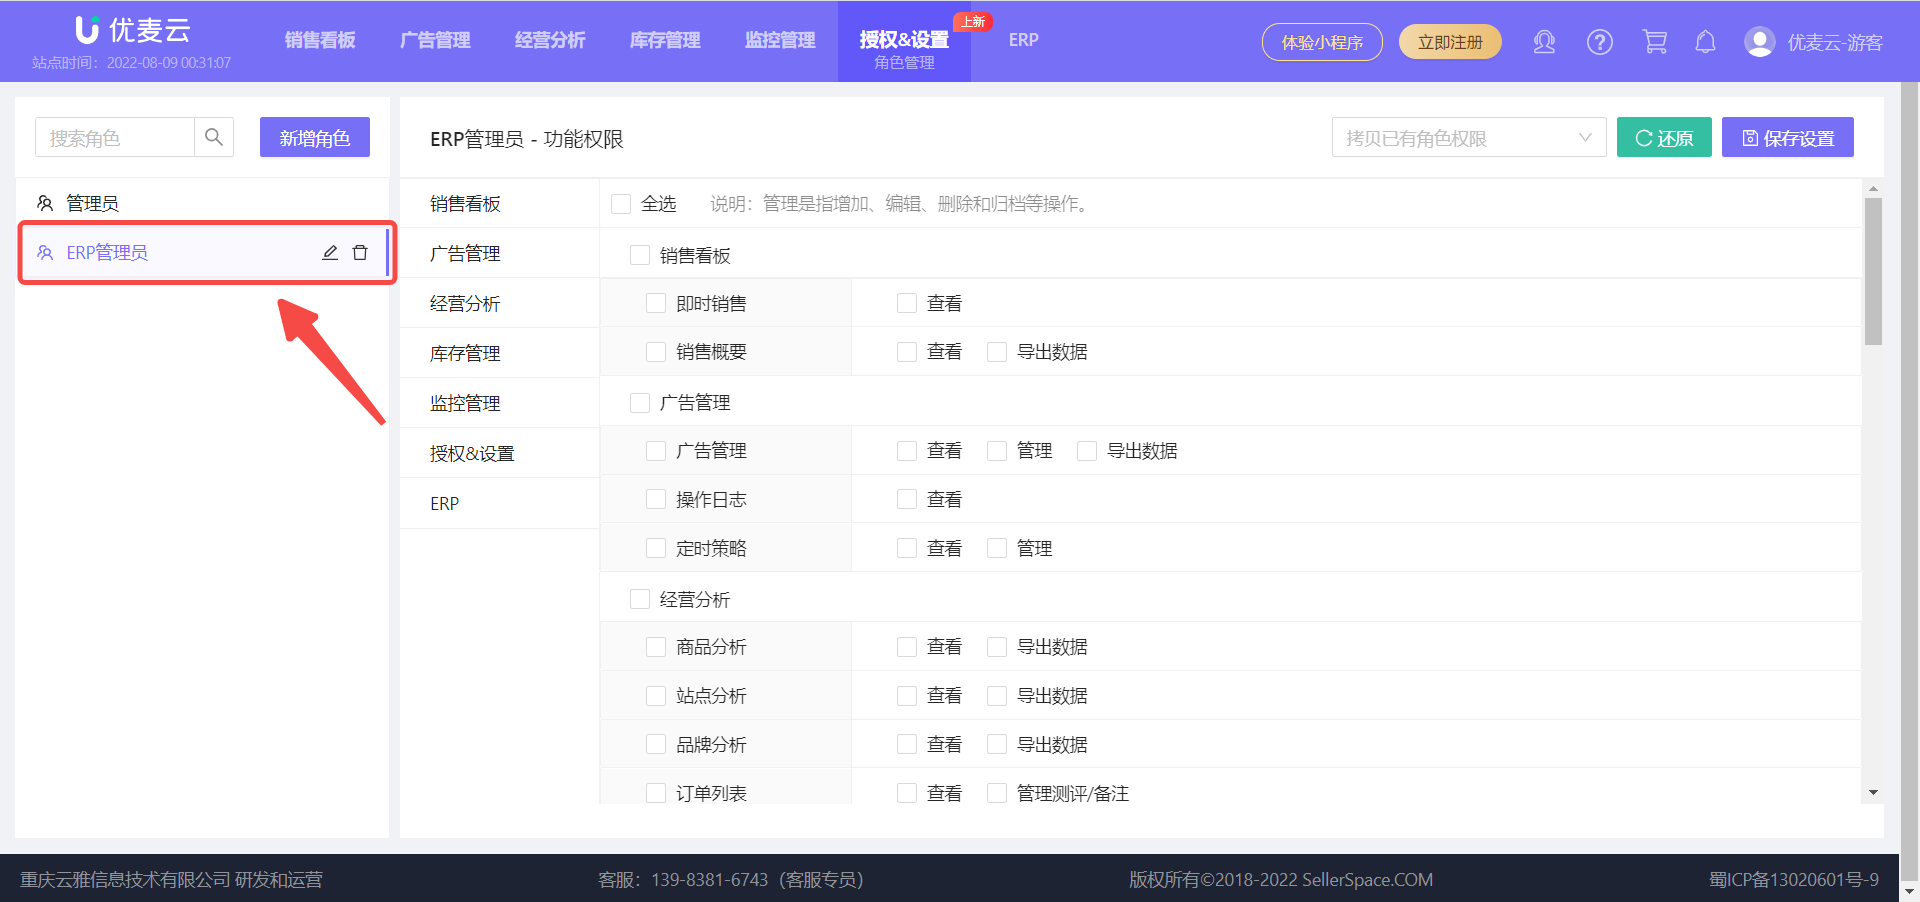
1.4 After saving the role, further assign permissions to the role.
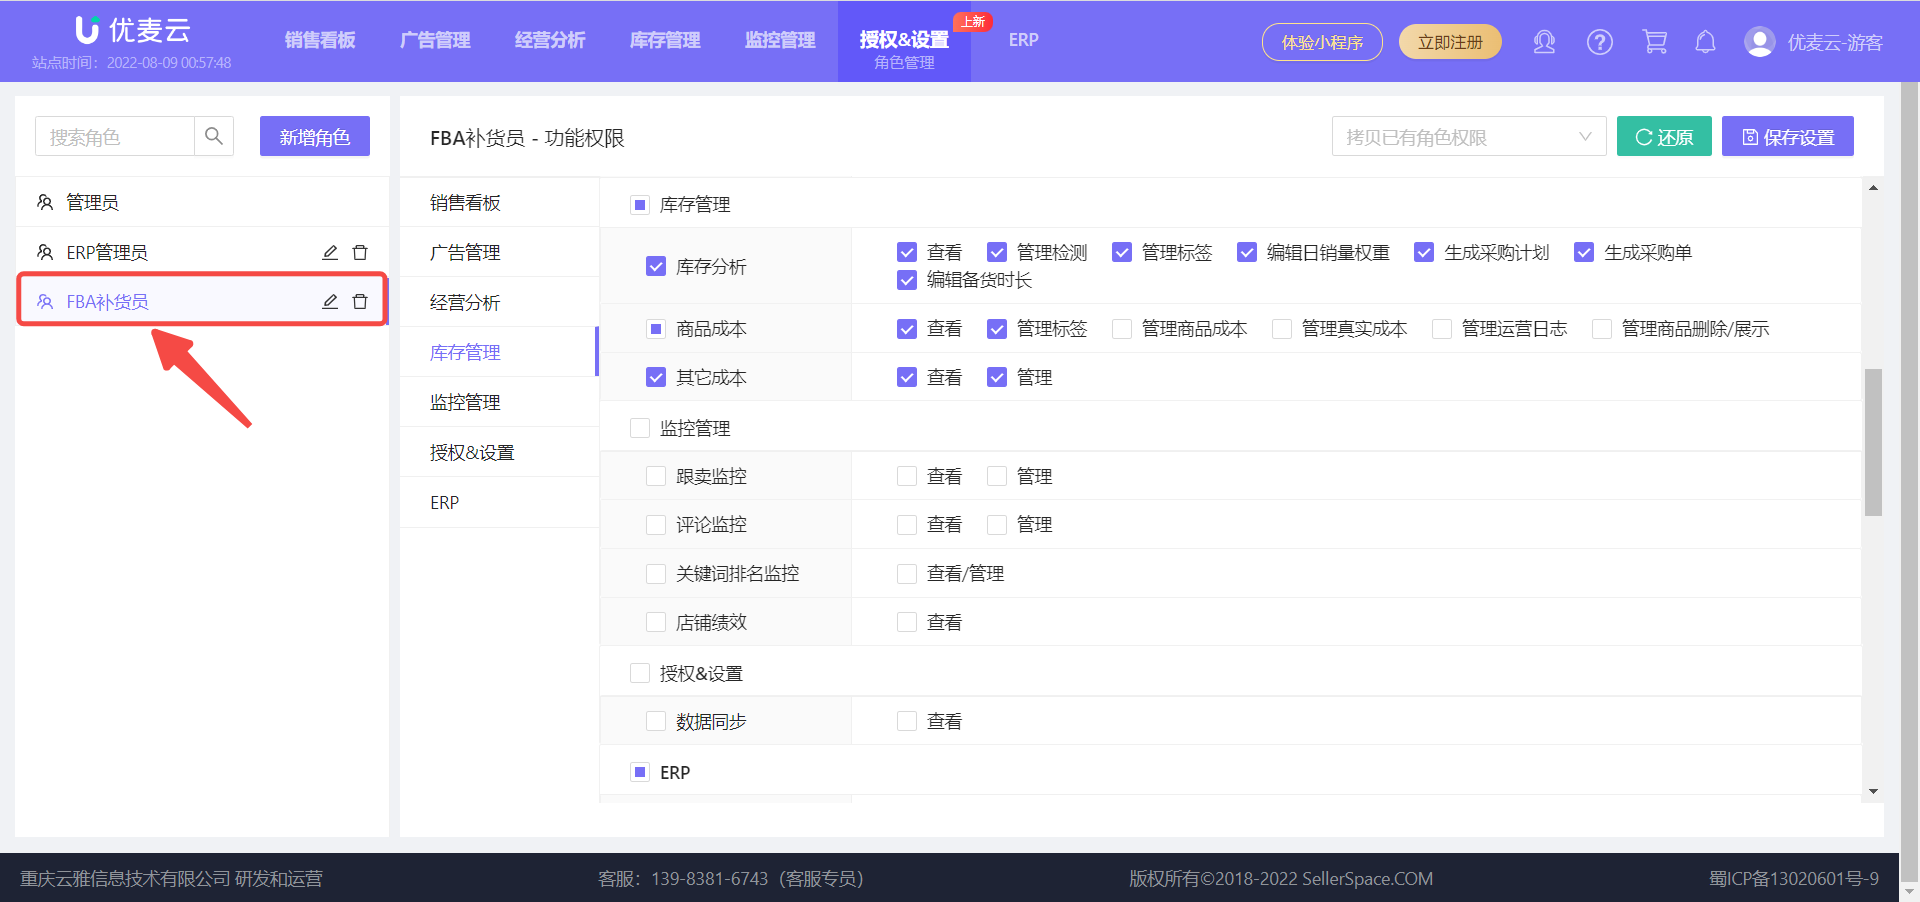
Click the role name 【ERP Administrator】 on the left to enter the settings page for this role,
 +
+
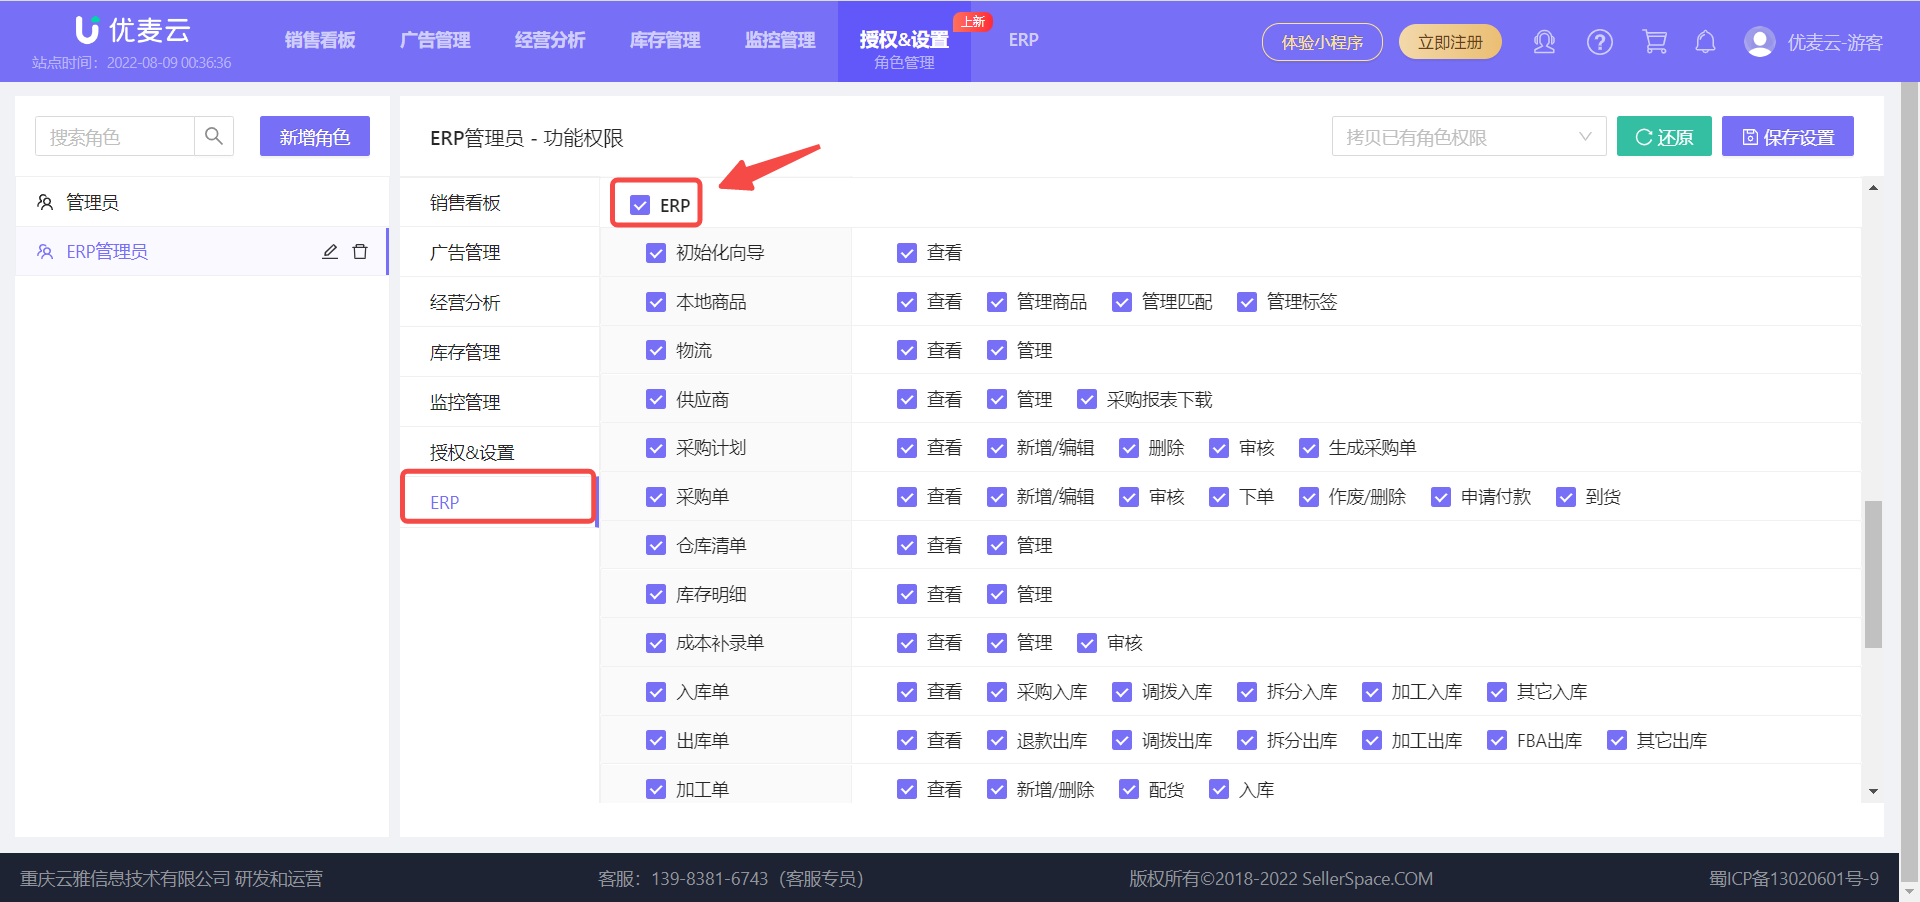
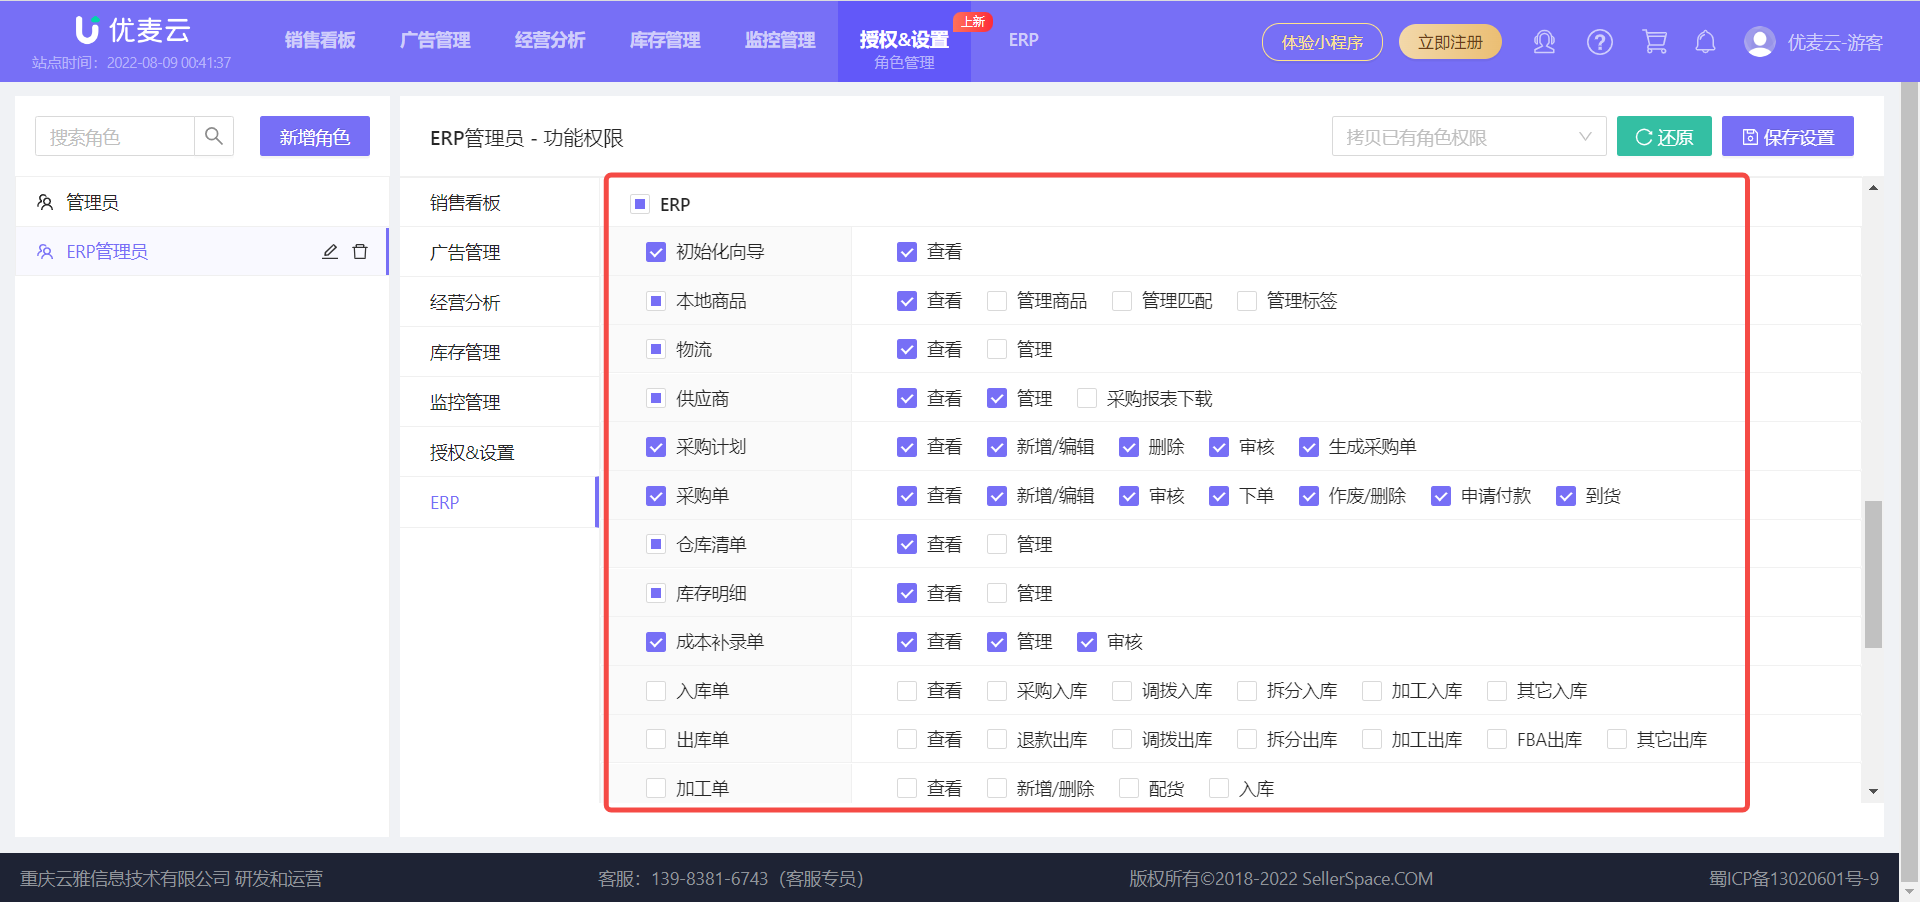
1.5 Select feature permissions for the role.
Each feature has separate viewing and operational permissions. You can check and set the corresponding feature permissions according to your needs.
Click 【ERP】 to enter the permission assignment page for this feature, and then check 【ERP】 at the top to select all options under this feature.
 +
+
You can also click to check each detailed feature for refined selection and flexible settings.
 +
+
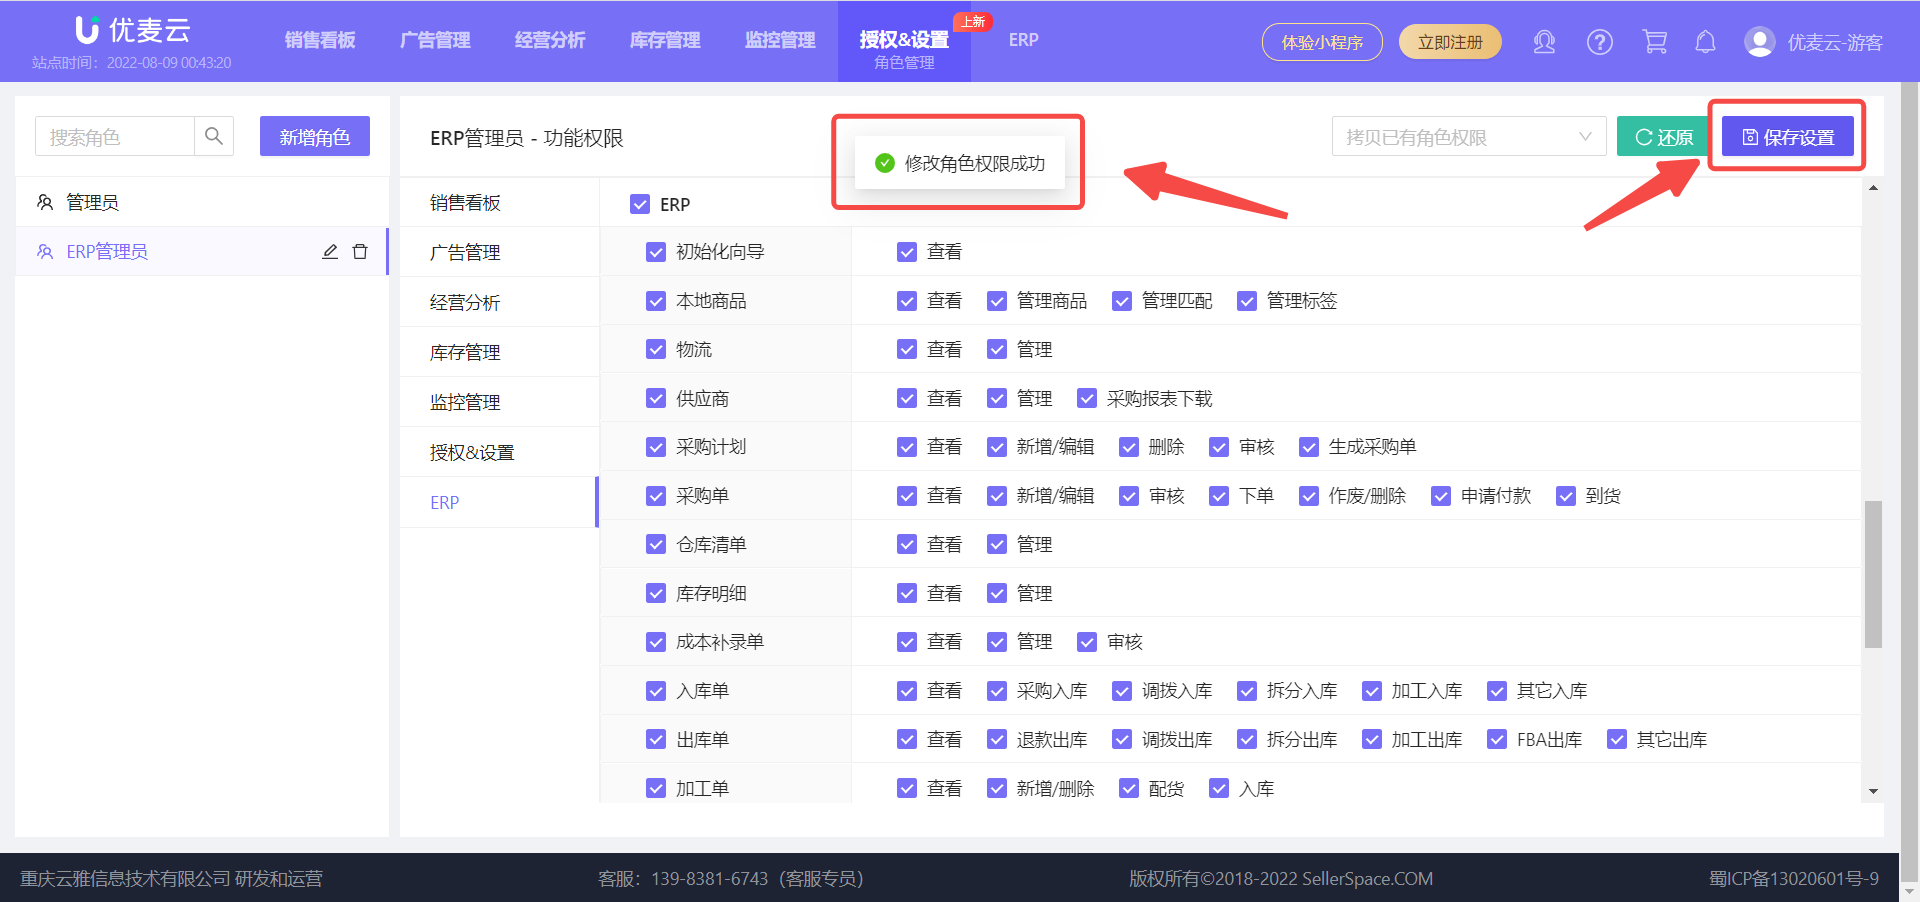
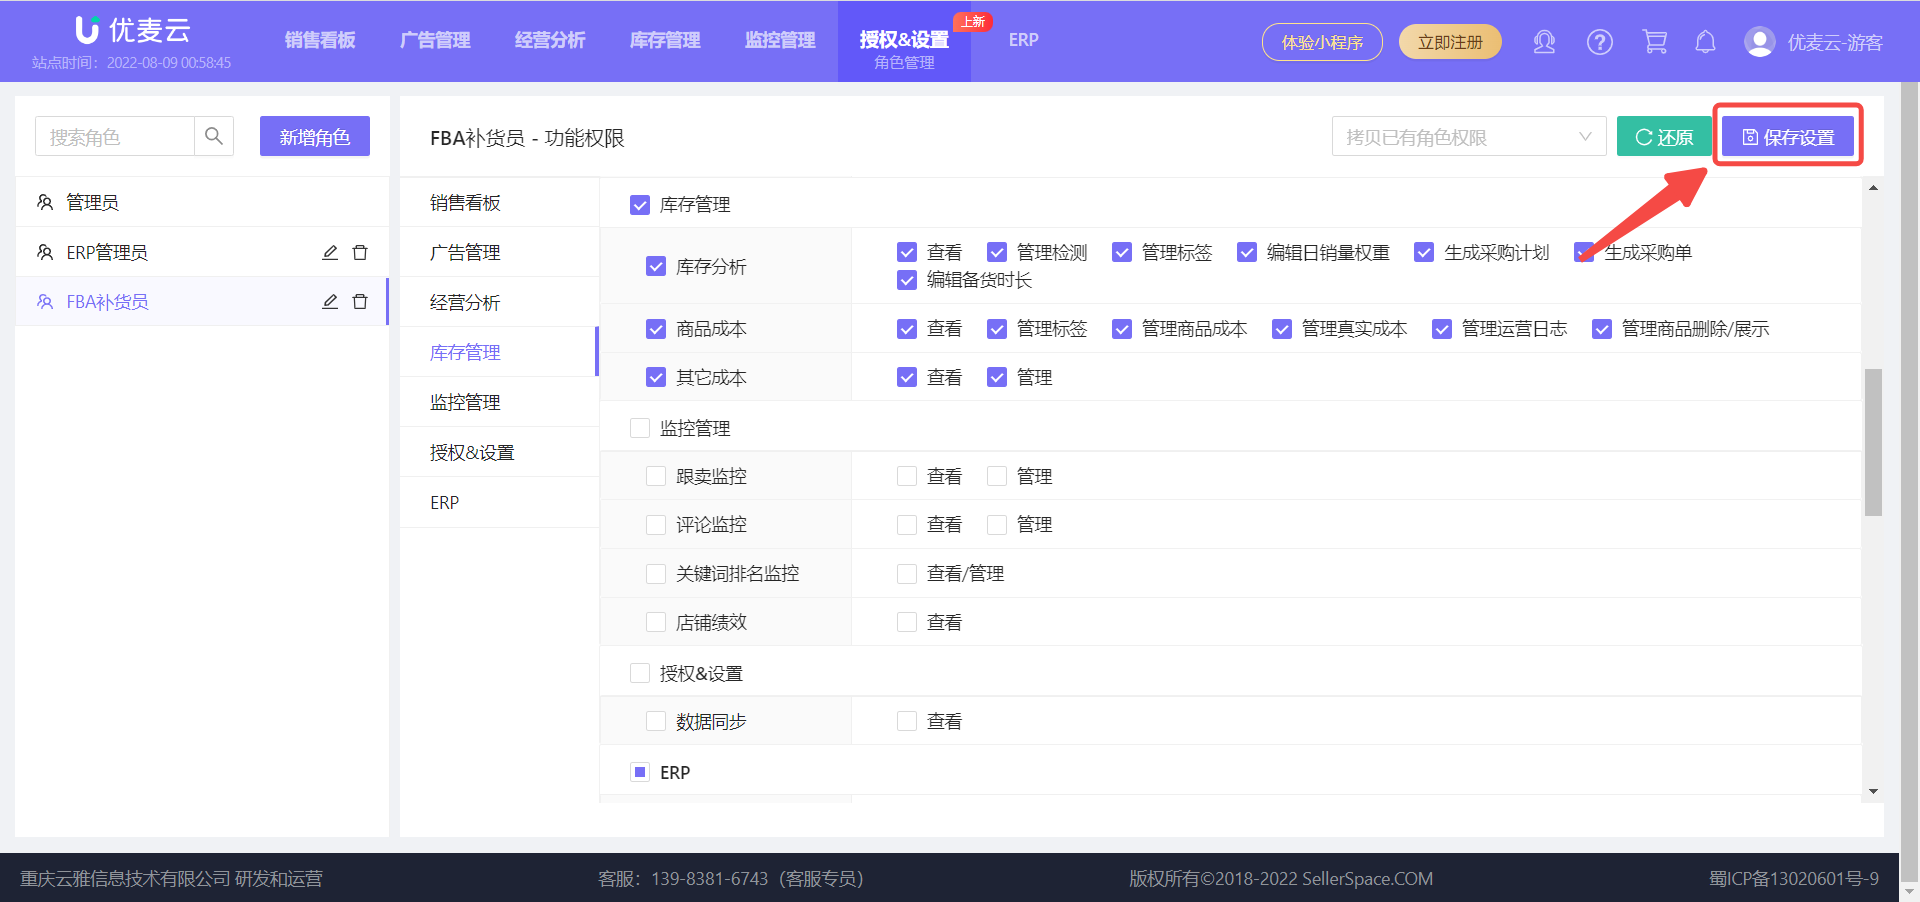
1.6 After the role permission settings are completed, click 【Save Configuration】 to complete the creation of the new role.
 +
+
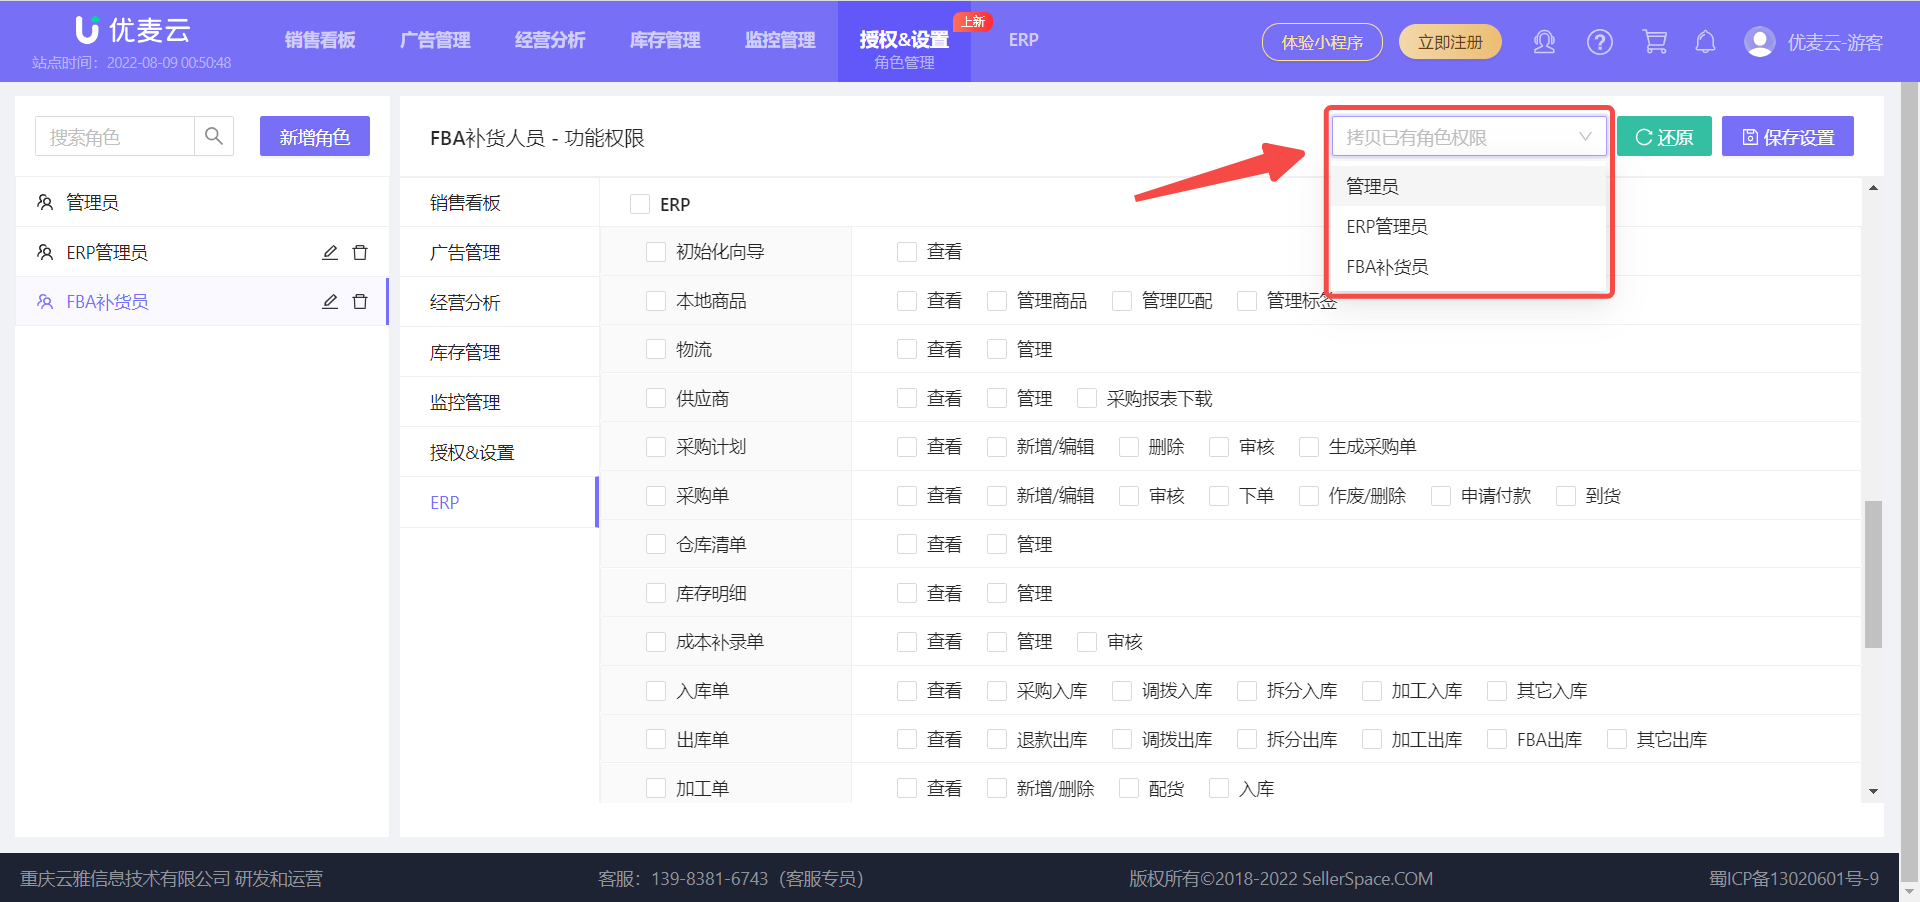
Copy to Create a New Role
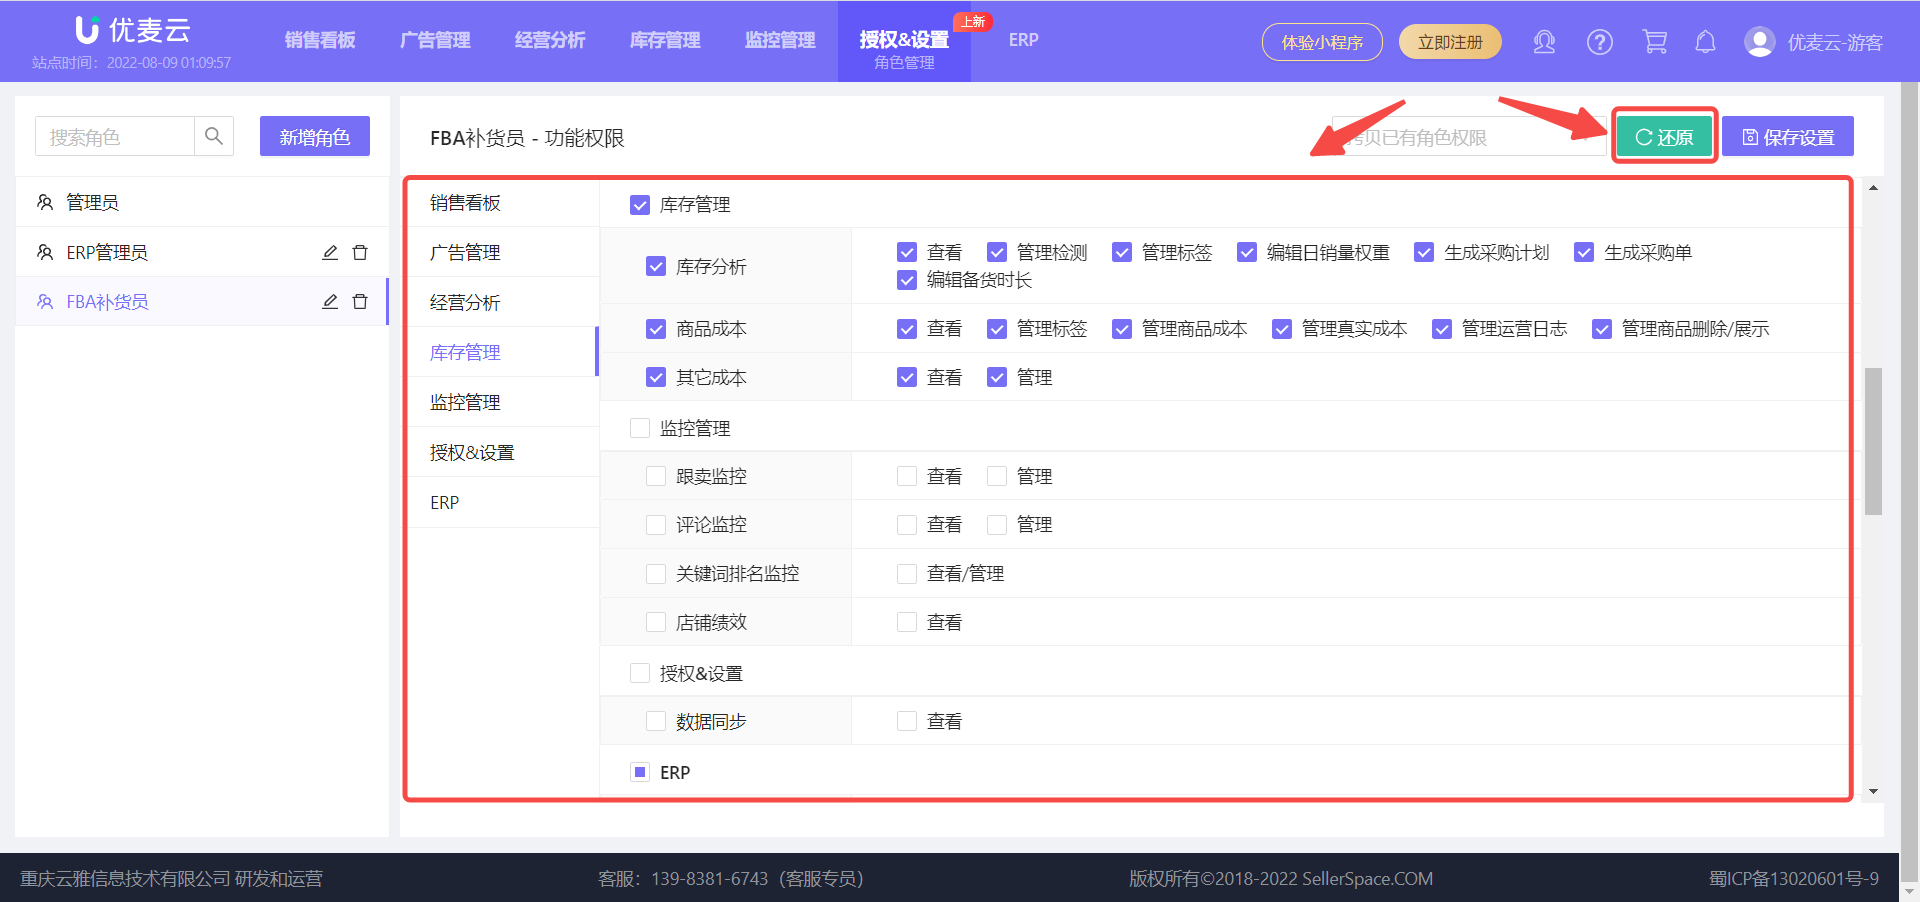
If you want to create a similar role, repeatedly checking permissions multiple times can be time-consuming and laborious. At this time, you can choose 【Copy Existing Role Permissions】 and edit it on that basis to save setup time.
 +
+
If you are not satisfied with the settings during the process, you can click 【Restore】 to restore to the original existing role permissions with one click, and then re-edit.
 +
+
2. Applying Roles
Once a role is created, you can apply it to the corresponding sub-account.
Application path: Authorization & Settings -> Sub-Account -> Operation -> Role (Roles can also be applied when creating a new sub-account)
 +
+
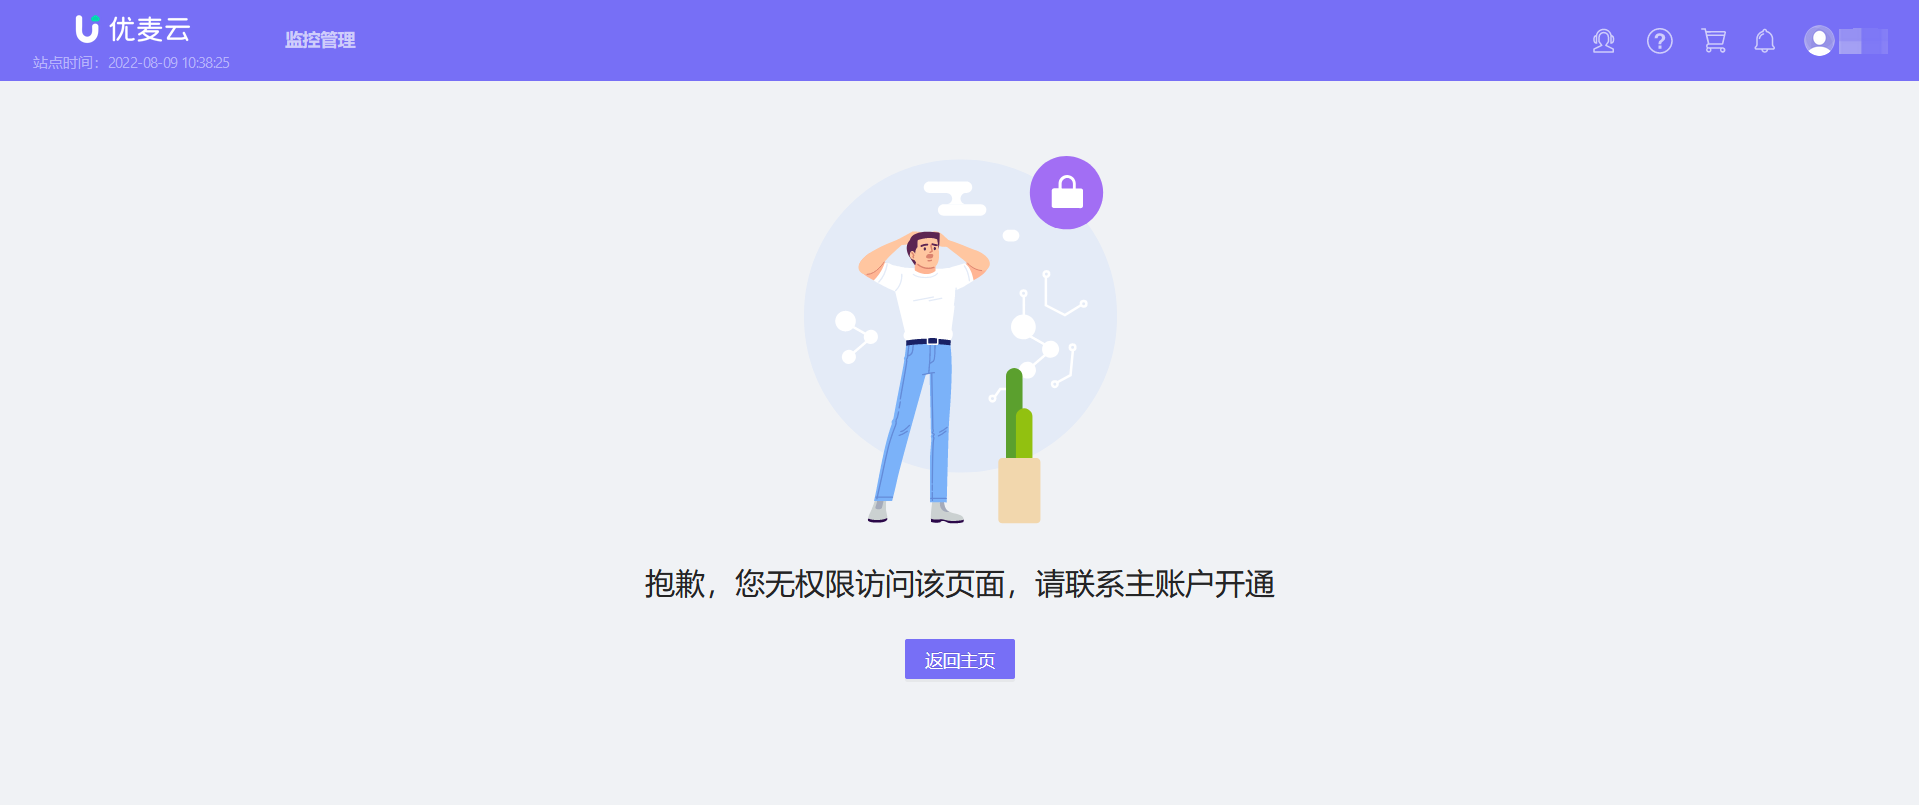
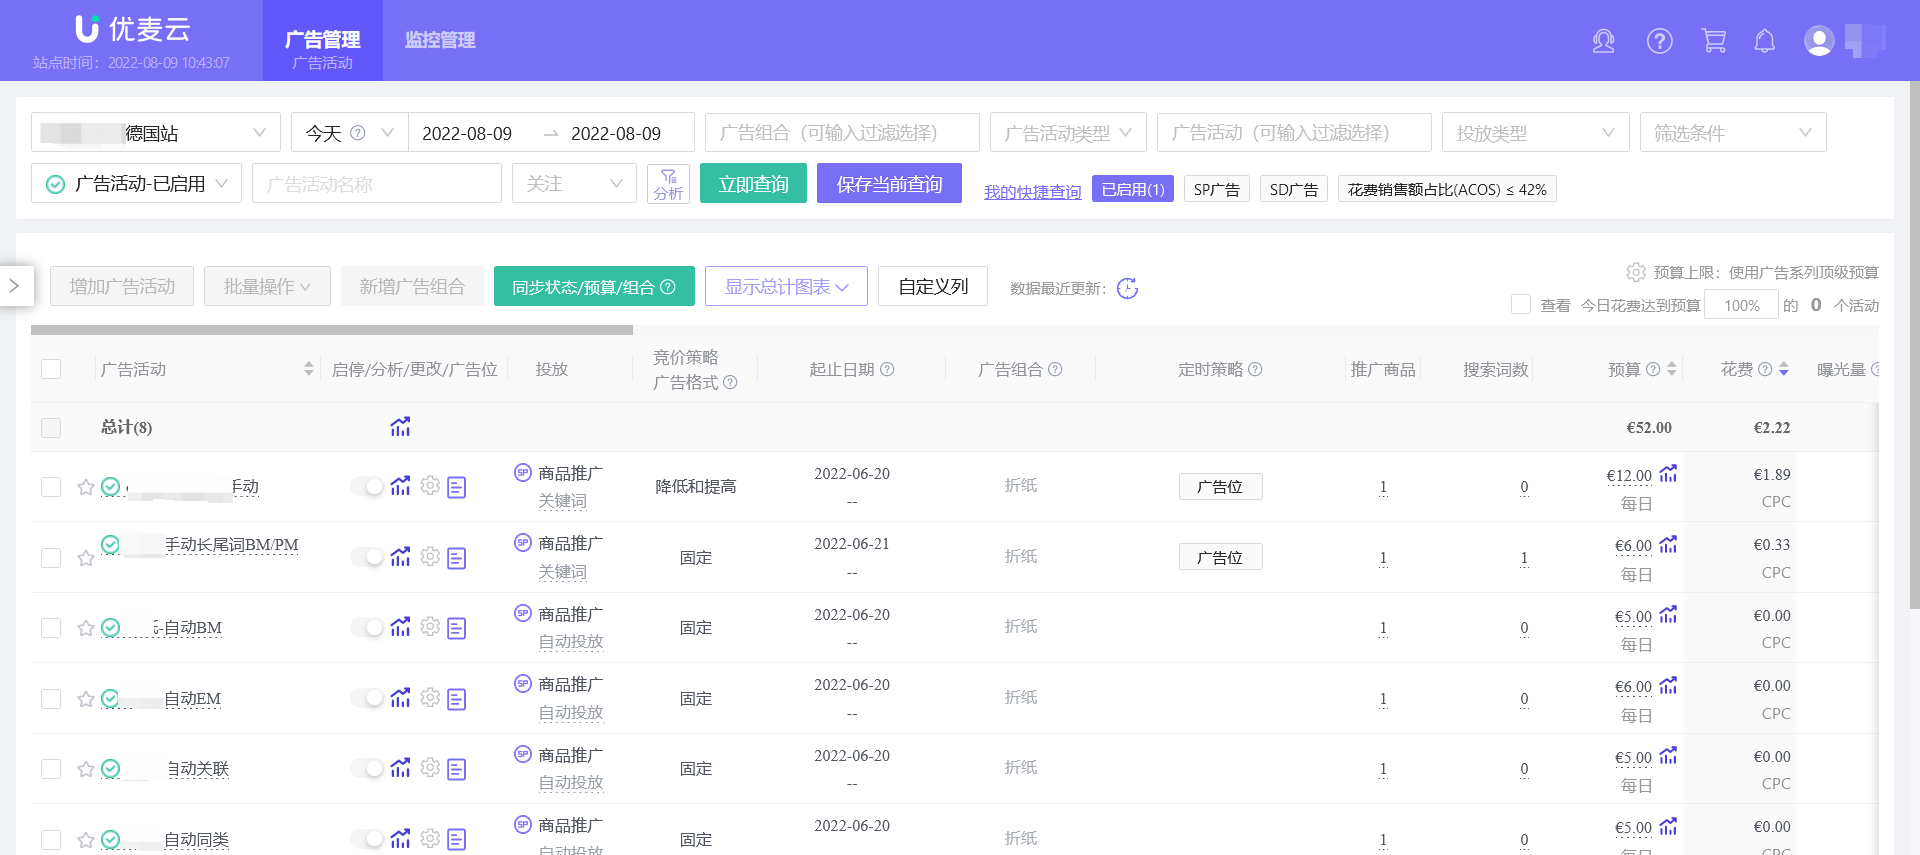
If a sub-account does not have permission for certain features, it will not be able to access or operate them. The page will display as follows:
Unable to access:
 +
+
Unable to operate:
 +
+
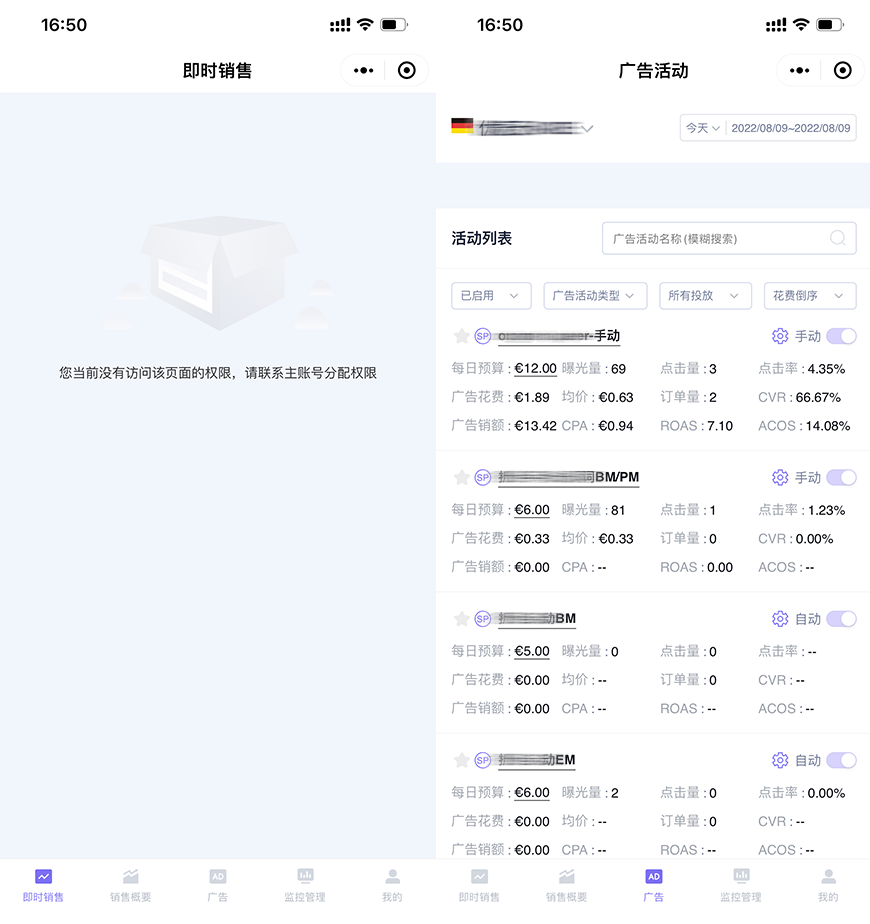
The WeChat Mini Program end of this sub-account will also be synchronized to only display feature data that it has permission to access.
 +
+
3. Managing Roles
The main account can manage all set roles, including: modifying role names, resetting role permissions, deleting roles, etc.
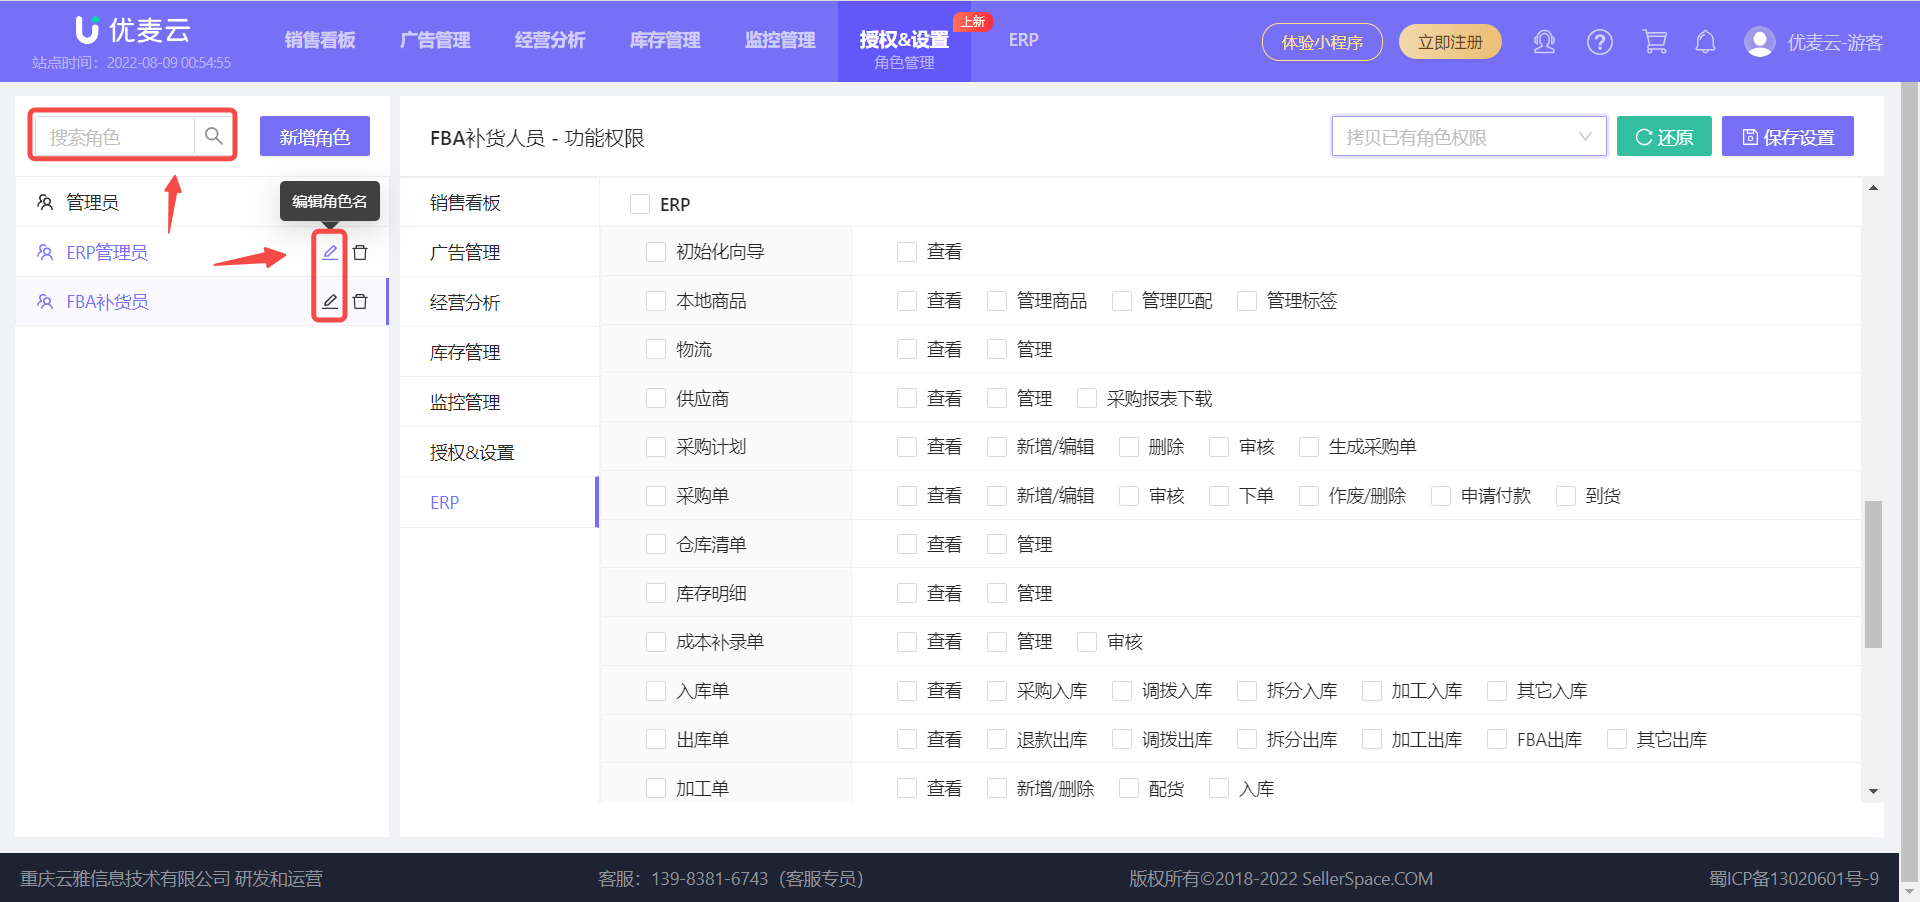
3.1 Modifying Role Names
Find the corresponding role and click the 【Edit】 button to enter the modification page,
 +
+
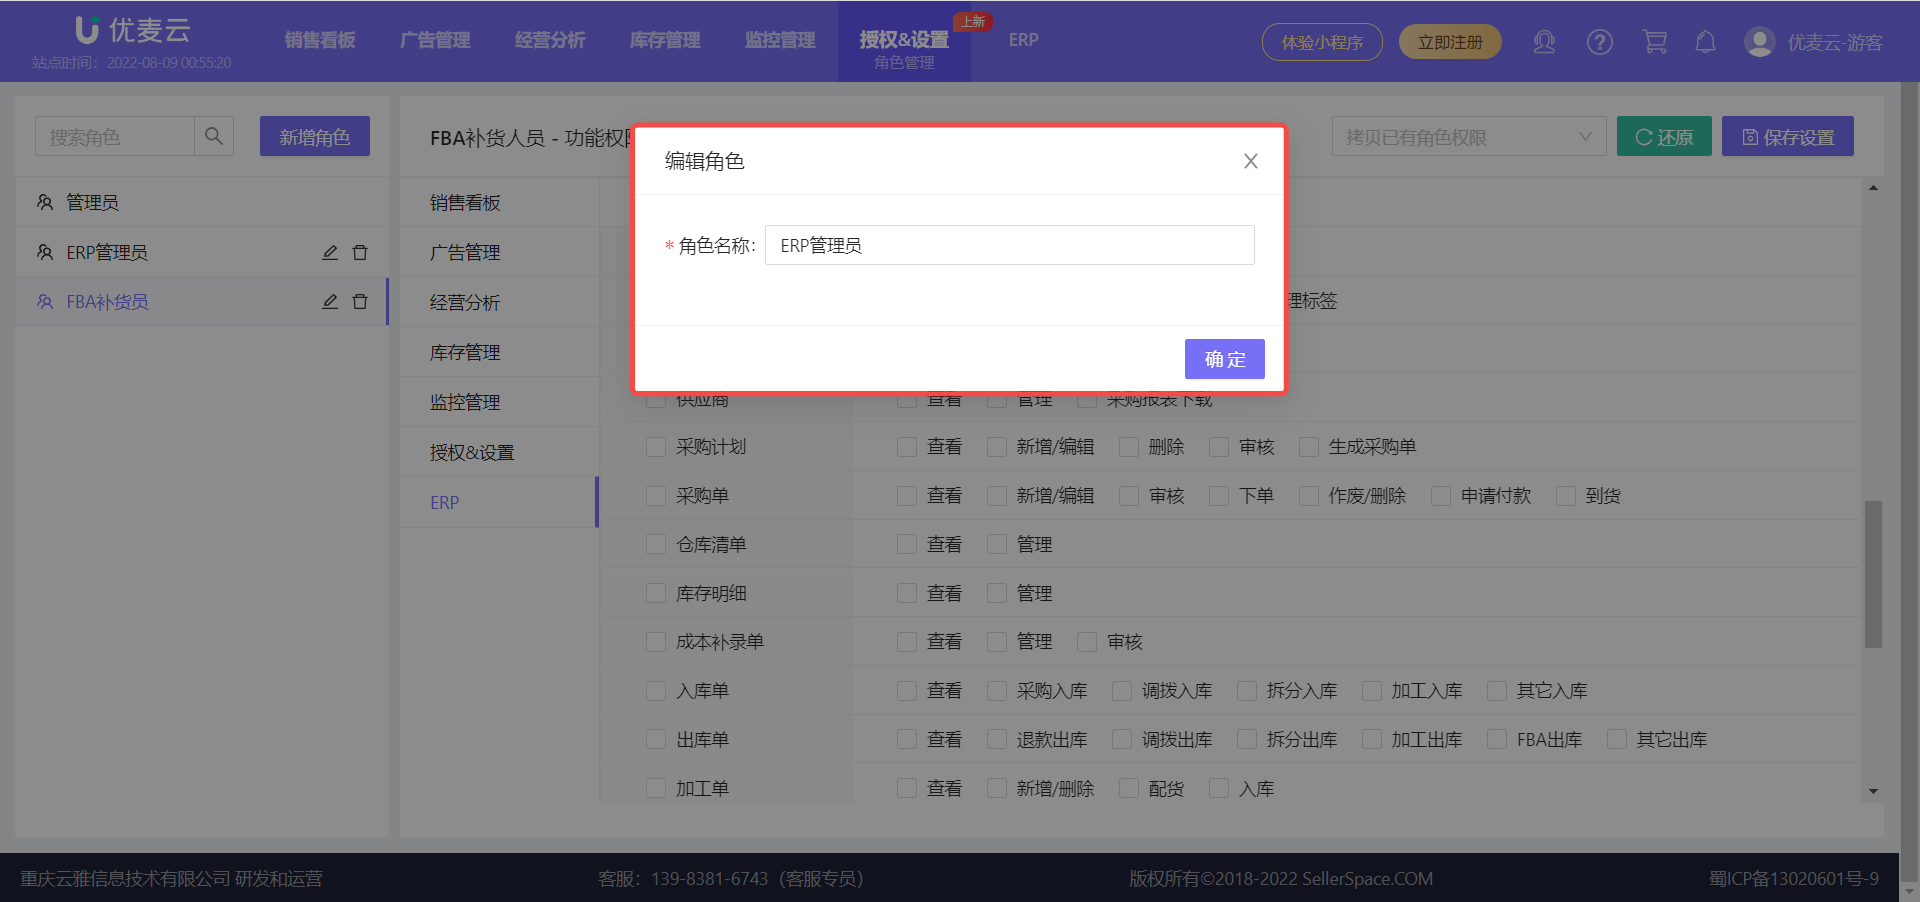
Enter the new role name, then click 【Confirm】 to save.
 +
+
3.2 Resetting Role Permissions
Find the corresponding role and click the role name to enter the permission settings page,
 +
+
Reset the permissions according to your needs,
If you are not satisfied with the settings, you can also click 【Restore】 and then reset,
 +
+
After setting, click 【Save Configuration】 in the upper right corner to complete the reset.
 +
+
3.3 Deleting Roles
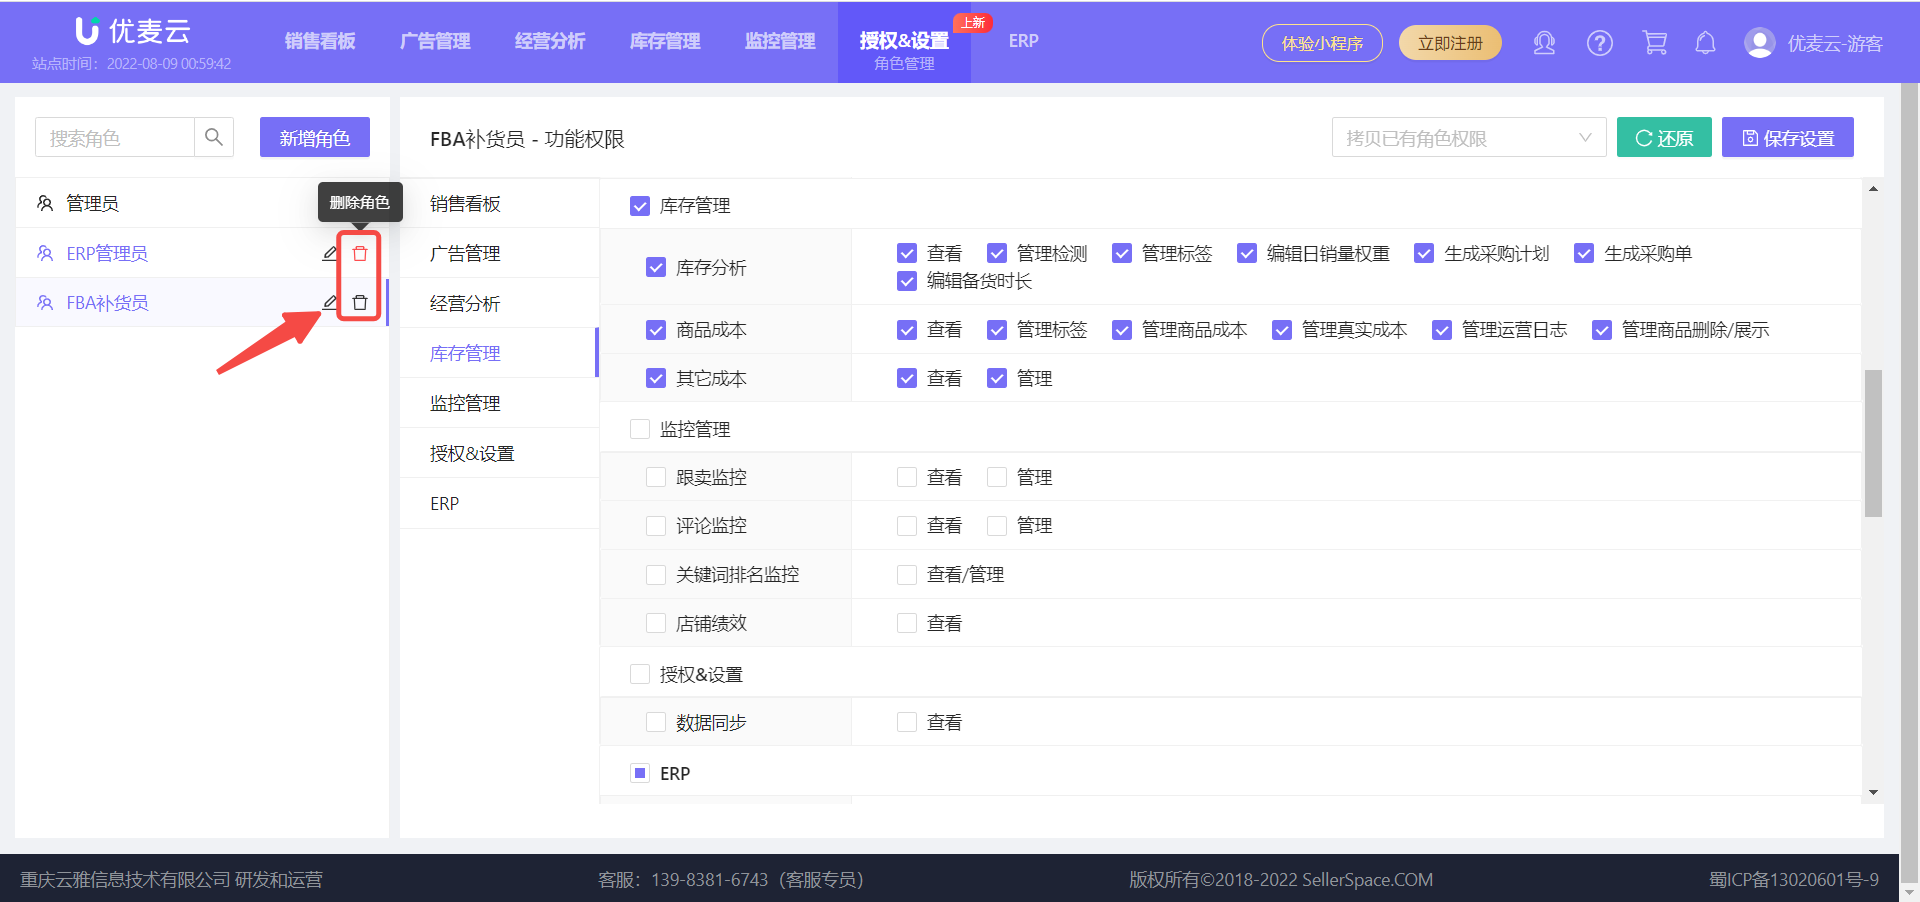
Find the role to be deleted and click the 【Delete】 button on the right to delete it with one click.
 +
+
Special Notes:
- If a role has already been applied to a sub-account, it cannot be directly deleted. You need to modify the role of the sub-account first, and then delete it.
- The path to modify roles is the same as the path to apply roles.